Ferret Drawing Step by Step
Have you ever wanted to know how to draw a ferret? They are not the most common pets worldwide, but these fluffy little critters are growing in popularity. With their bright and beady eyes, soft fur, and intelligence, ferrets are not only interesting to interact with, but they are also great to draw. With their long bodies and large ears, ferret drawing offers great lessons in proportionality and perspective. In this easy-to-follow tutorial, we take you through all the foundational steps to create a beautiful and realistic ferret drawing.
Table of Content
- 1 How to Draw a Ferret Step-by-Step
- 1.1 Step 1: Constructing the Main Body
- 1.2 Step 2: Constructing the Head of Your Ferret Drawing
- 1.3 Step 3: Constructing the Muzzle of Your Ferret Drawing
- 1.4 Step 4: Constructing the Ears of Your Ferret Drawing
- 1.5 Step 5: Constructing the Tail of Your Ferret Drawing
- 1.6 Step 6: Constructing the Neck of Your Ferret Drawing
- 1.7 Step 7: Constructing the Feet for Your Ferret Drawing
- 1.8 Step 8: Outlining the Final Shape of Your Ferret Drawing
- 1.9 Step 9: Creating the Facial Features of Your Ferret Drawing
- 1.10 Step 10: Creating the Fur Detailing
- 1.11 Step 11: Adding the First Coat of Color
- 1.12 Step 12: Adding the Second Coat of Color
- 1.13 Step 13: Adding Shading to Your Ferret Drawing
- 1.14 Step 14: Painting the Facial Details
- 1.15 Step 15: Finalizing Your Ferret Drawing
- 2 Frequently Asked Questions
- 2.1 Can You Follow This Ferret Drawing Tutorial With Watercolor Paint?
- 2.2 What Is the Hardest Part of Drawing a Ferret?
How to Draw a Ferret Step-by-Step
Ferrets are a member of the weasel family, and as such they share a common ancestor with badgers, otters, sables, and stoats. The family resemblance can be seen in the long bodies and dark patchy coloring of many of these creatures. Around 2500 years ago, humans began domesticating ferrets, taking advantage of their natural quickness and slightness to use them for rabbit hunting. Ferret drawing offers a fantastic opportunity to practice your proportion skills, as their long bodies and round heads are quite unusual. In this tutorial, we will guide you through the process of using construction lines to perfect the perspective and proportion of your ferret.
You can use any coloring medium you choose for this tutorial. Whether you prefer to work on a graphics tablet, or you love watercolor paint, you can quickly and easily adapt the instructions to suit your favorite medium.
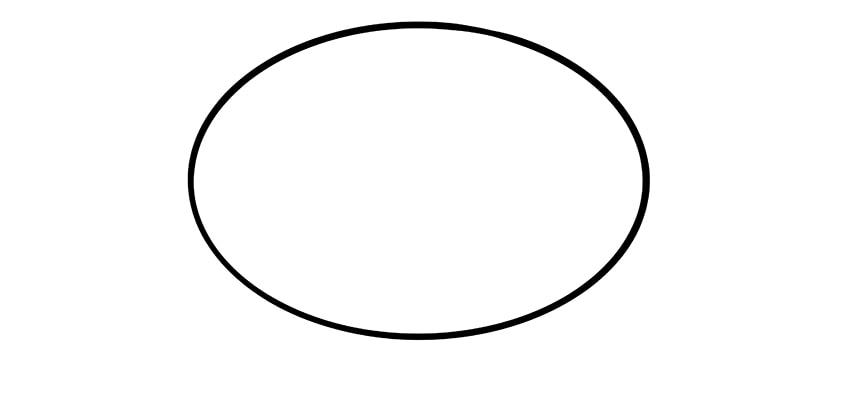
Step 1: Constructing the Main Body
If you have completed any of our other animal drawing tutorials, then you will know that we always begin by laying down the whole animal with construction shapes and lines. These lines help us structure the entire drawing and make sure we have the correct proportions before we start adding the time-consuming details. For this ferret drawing, you are going to begin the construction process using a fairly long oval shape to represent the main part of the ferret's body.
Our top tip for this first step is to ensure that your oval is in the very center of your canvas and that there is plenty of space on all sides of it. You will be adding the neck and head, legs, and tail in the next few steps.
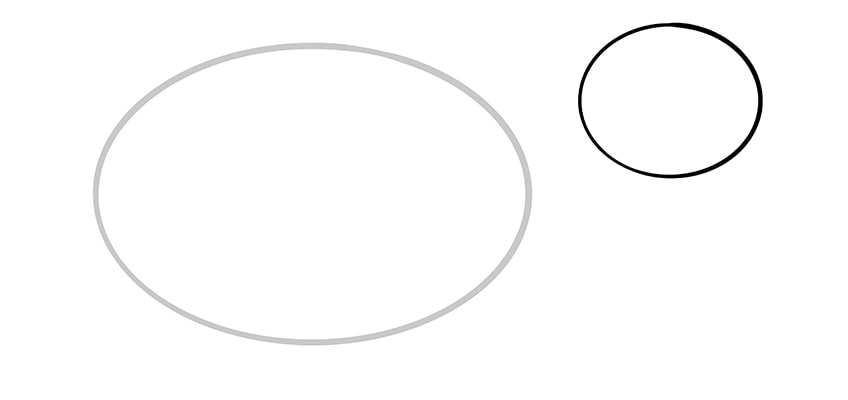
Step 2: Constructing the Head of Your Ferret Drawing
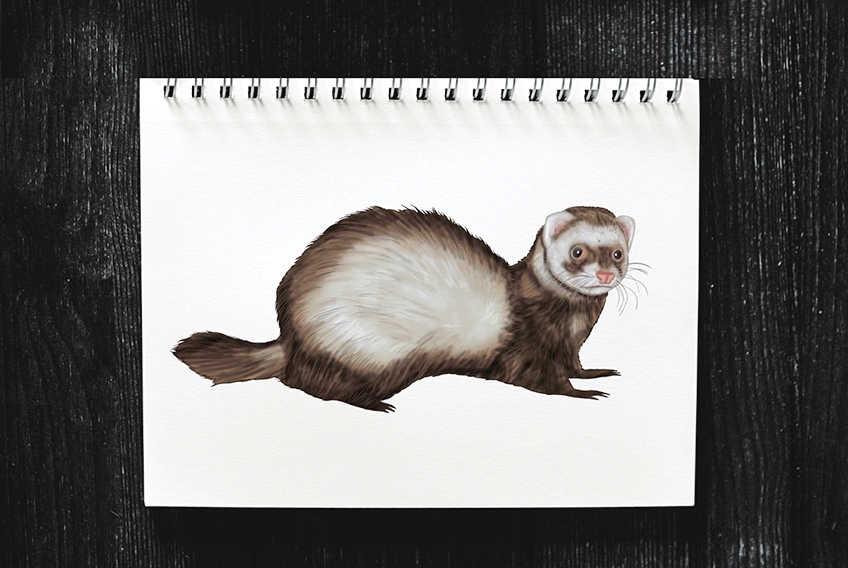
The next largest part of the ferret's body is the head. You can see from the final drawing at the start of this tutorial that ferrets have very round heads. As such, we are going to use a slightly flattened circle to represent the head in this ferret drawing. You can draw this head circle just to the right of the main body oval that you drew in the previous step.
In this step, you want to ensure that the head circle sits slightly higher than the main body oval in order to get the proportions spot on.
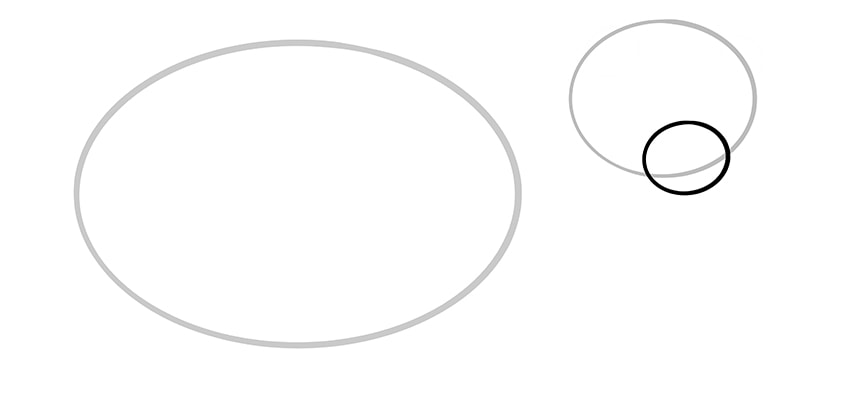
Step 3: Constructing the Muzzle of Your Ferret Drawing
If you were to look at the head of a ferret from the side, you would see that they have a slightly protruding muzzle. Because of the position of this ferret drawing, we are drawing the ferret's face from head-on, so we need to take this perspective into account when we draw the nose and mouth. To capture this protrusion, we are going to use a smaller oval to represent the nose and mouth.
Ideally, you want the majority of this smaller muzzle oval to overlap with the head oval. The muzzle oval should also be slightly to the right of the center line in the head oval, as you can see in the example below.
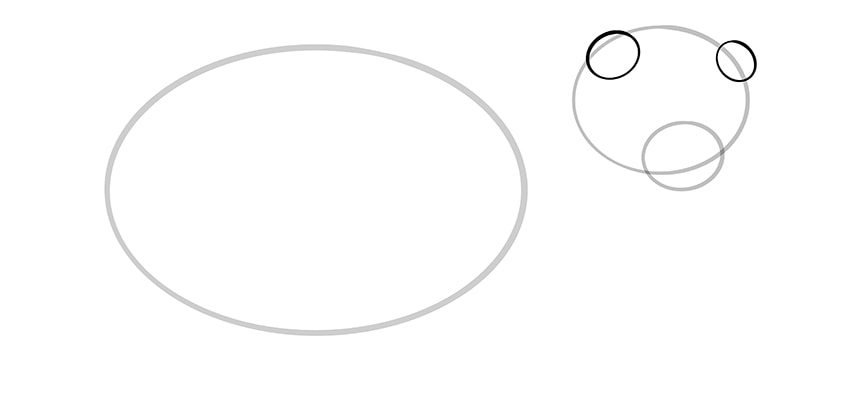
Step 4: Constructing the Ears of Your Ferret Drawing
This fourth step is a nice and easy one, but you still have to be aware of the perspective in the way that you construct the ears of your ferret. To represent each ear, you can use two slightly oval shapes.
For the ear on our left, draw the oval shape overlapping significantly with the head oval. This first ear oval should overlap the head directly between the top point and the left side point. The oval for the right ear should be smaller than the left, and slightly more angled. It should also be slightly lower down the right side of the head oval.
The reason for this difference in size is once again the perspective that we are drawing the ferret from. The ferret's head is not facing us fully, but instead is slight tilted towards the right corner of your canvas. As a result, the right ear is ever so slightly further away from us and therefore appears smaller.
Step 5: Constructing the Tail of Your Ferret Drawing
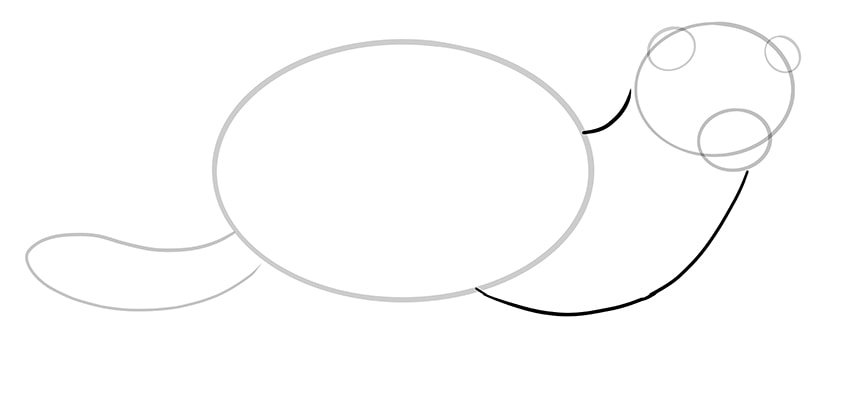
Ferrets have quite thick and bushy tails, as a result, we can use a long curved "U" shape to construct it. This tail construction line should be attached to the back of the ferret's body at the bottom of the back of the main body oval.

Step 6: Constructing the Neck of Your Ferret Drawing
This is another simple step, in which you are going to use two curved lines to join the main body to the head construction shape. You can start the top line of the neck just above the central point of the main body oval and join this directly to the central point in the side of the head oval. This top line is going to be very short. For the bottom line, start just to the right of the bottom of the main body oval. You can then curve this line until you meet the muzzle circle, just to the right of the bottom point.
The neck should be quite wide, as it also contails the shoulders and chest of the ferret.
Step 7: Constructing the Feet for Your Ferret Drawing
From this perspective, there are only three visible legs. There are two legs in the front and the single back leg closest to us. Let us begin by constructing the back leg. Start the line at the very back point of the main body oval, and take it directly down until it is just below the level of the bottom of the tail. You can then take the line forward and slightly down, before sharply doubling back to create a pointy foot. Finally, finish this back foot by taking the line forwards and curving it up to meet the bottom of the main body oval just before the neckline.
The front two feet are more simple to draw. Simply start on the lower neckline and draw two pointy shapes. The upper foot should be slightly smaller and slightly hidden behind the lower one.

Step 8: Outlining the Final Shape of Your Ferret Drawing
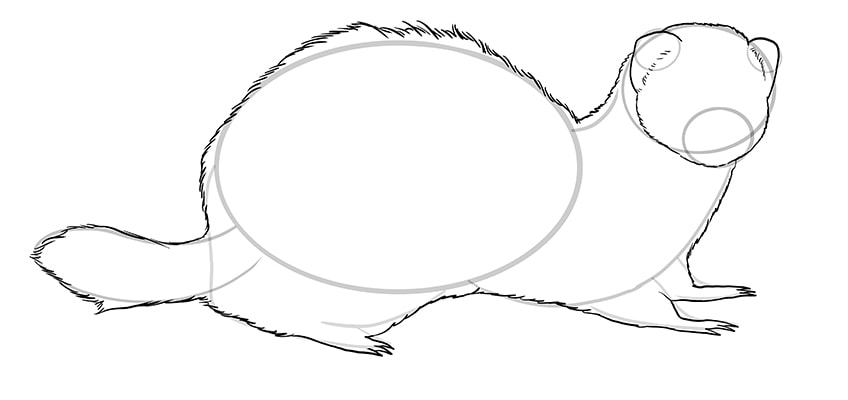
In this step, you are going to use all of the construction lines that you have drawn so far to create the final outline of your ferret drawing. Although we are creating the outline, you do not want to use a single smooth line. Instead, use very small strokes to give the impression of fur for a more realistic ferret drawing. You can, however, use smooth lines to add small curves to the feet and ears.
You can follow the construction lines pretty closely, but you can make your drawing more realistic by adding a few lumps and bumps.
Step 9: Creating the Facial Features of Your Ferret Drawing
This is a very detail-oriented step so it may take you some time to complete. Remember that patience is key, and even if you have to erase your work and start again, this will be good practice.
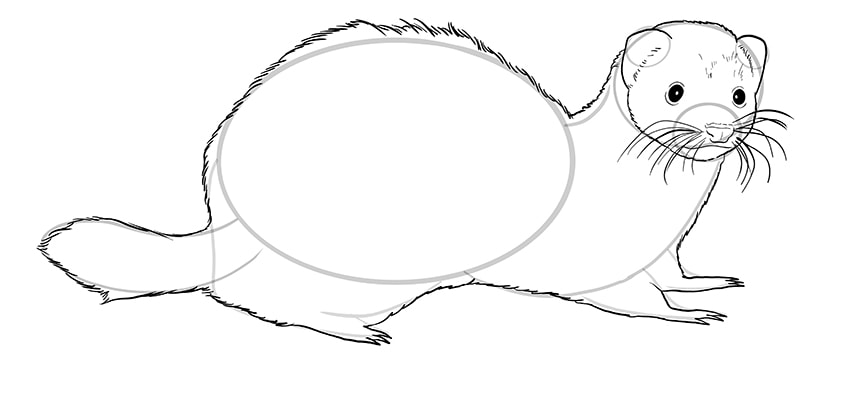
Begin by drawing two circular eyes and coloring them in black. For added realism, leave a tiny spot of black space to represent the reflection in the iris. To finish the eyes, add a single fine line around each eye for more depth.
On the muzzle circle, draw the two nostrils and a curved line below to create the mouth. You can add a slight line of fur strokes above the nose, and finish this part of the drawing by adding quite a few long whiskers around the nose.
When you are happy with the details in your ferret's face, you can erase all remaining construction lines.
Step 10: Creating the Fur Detailing
In this step of the drawing tutorial, you are going to use long curved fur strokes to add fur detailing to the entire body of your ferret drawing.
Our top tip for this step of the tutorial is to use the shape of the ferrets body to guide the direction of your fur strokes. For the most realistic fur detailing, you can also vary the length of your hair strokes, with shorter ones on the face and longer ones towards the tail.
You can leave the tips of the feet and the ears free from fur, as ferrets tend not to have fur inside their ears or on their toes.

Step 11: Adding the First Coat of Color
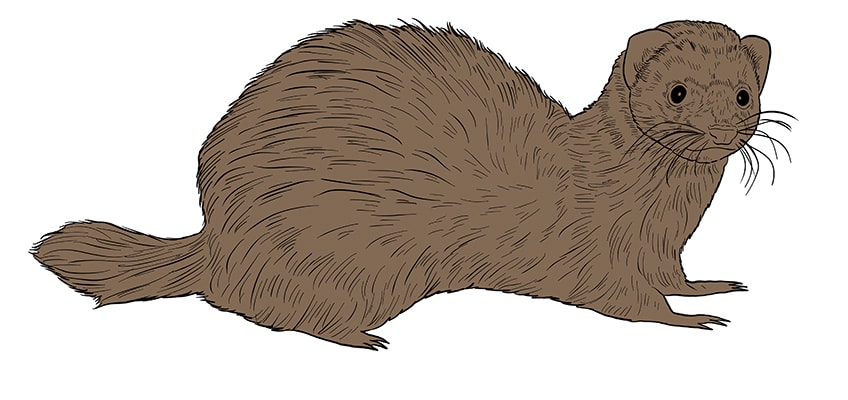
To build up a natural coloring, we will use several different coloring steps. For this first coloring step, you need to choose a fairly dark brown color to act as your base coat. You can use this shade to fill the entire body of your ferret drawing.
If you are using watercolor paint, you should try to apply your paint as quickly as possible so you do not end up with a patchy coat.
Step 12: Adding the Second Coat of Color
The second color you are going to use to color your ferret drawing is white. Use a small and soft brush to apply a light coat of your white paint to the center of your ferret's main body. You can also add a touch of white to the ferret's chest and on its neck below the line of the head.
Finally, use your white color to color in the ears, and create a pattern on the face. Your ferret's nose and eyes should remain brown and should be circled by a band of white.
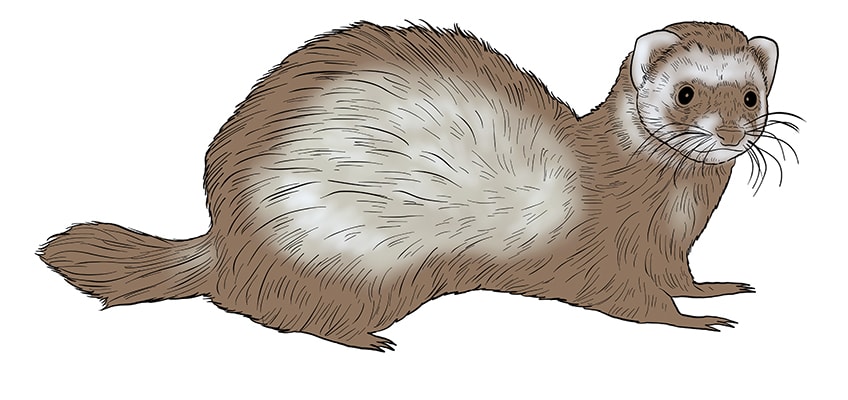
Step 13: Adding Shading to Your Ferret Drawing
The third layer of coloring we are going to use to create the realistic coat of your ferret is a black shade. In this step, you are going to use the black paint very lightly to add shading around the edges of the brown areas in the ferret's coat. Focus your shading around the brown areas in the face, around the outside of your ferret's body, and on the lower half of the ferret's body.
Try to use strokes of your paintbrush that follow the hairline textures on your ferret's coat. This method will make your coloring appear more natural and textured.
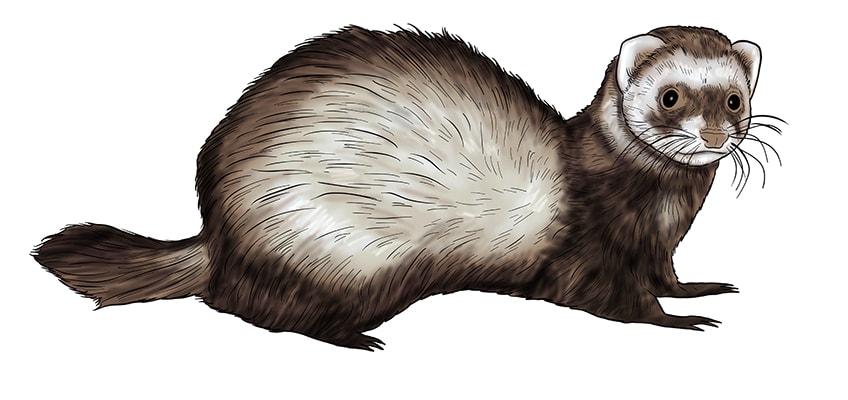
Step 14: Painting the Facial Details
In this step, choose a light pink color to add definition to some of the facial details on your ferret. Use a small brush to paint the very inner part of the ear pink, and then you can use the same shade to color in the ferret's nose. Finally, you can paint a pink circle around the eyes, and then use a touch of white paint to brighten the reflective spots in the iris.
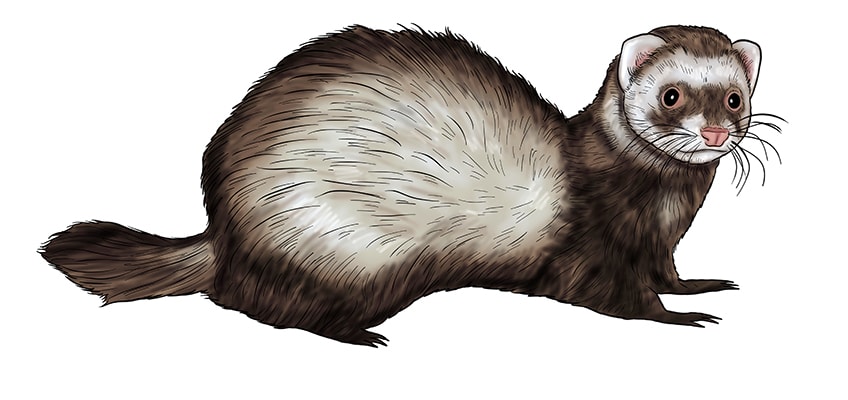
Step 15: Finalizing Your Ferret Drawing
You are welcome to leave your drawing at the end of the last step if you are happy with it, but this final step can help elevate the realism in your ferret drawing. In this step, you are going to erase the outline and the fine hairlines of your ferret body. If you are using a graphic tablet, this is very simple. If you are using paint, you can use the appropriate color for each part of the ferret's body to trace over the fur lines and outline.
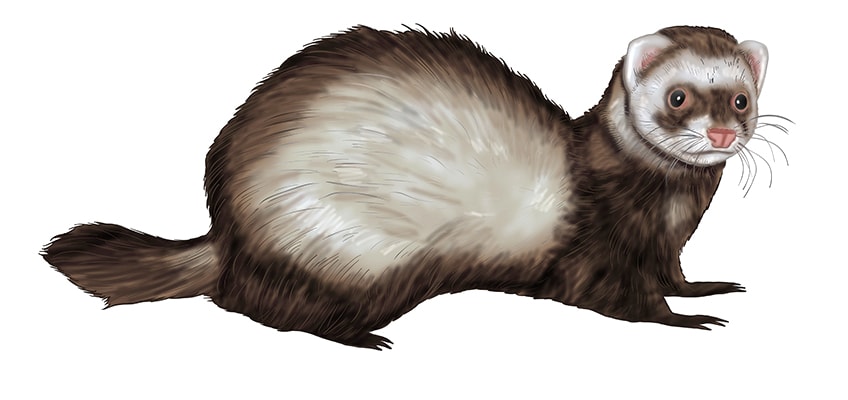
You have come to the end of this how to draw a ferret step-by-step tutorial! Hopefully you are happy with your final drawing and you feel more comfortable to pursue other animal drawing projects in the future. The more you practice using construction lines to map out your proportions, the easier it will become to draw by eye.
Frequently Asked Questions
Can You Follow This Ferret Drawing Tutorial With Watercolor Paint?
Absolutely, you can use any medium you choose to follow this tutorial. If you are going to use watercolor paint to complete this how to draw a ferret tutorial, you will need to work a little more quickly when it comes to applying color as watercolor does tend to dry a little faster than other mediums like acrylic paint.
What Is the Hardest Part of Drawing a Ferret?
Because of the ferret's unique body shape, getting the proportions and perspective just right can be the most challenging stage of this tutorial. Fortunately, we have a tried and tested construction method that you can easily use to perfect your proportions before you begin adding any details. This way, you will not end up having to erase a beautifully detailed head because you discover you have no room for the body!
Source: https://artincontext.org/how-to-draw-a-ferret/
0 Response to "Ferret Drawing Step by Step"
Postar um comentário